New to cPanel? There is a lot to see, learn, and do when it comes to using this control panel for managing your website hosting.
However, when you’re just starting out, it’s important to quickly identify the correct things to do and then do them correct. Website visitors will be happy, hosting security will be tight, and you’ll be well-informed and in control.
1. Accessing cPanel
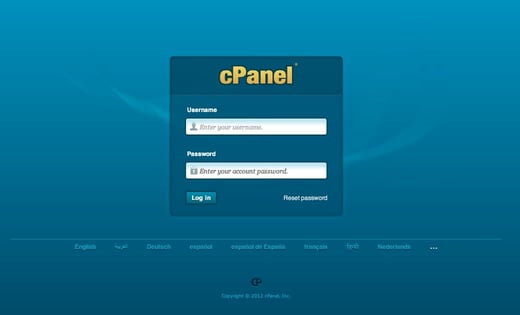
It may sound obvious, but none of what follows will be of any use to you if you can’t access cPanel. To do this, find out the IP address for your website. You may be able to use the domain name of your website right away, but the IP address should always work.
Then type this into your browser:
https://your_IP_address_here:2083
You’ll replace “your_IP_address_here” by the real IP address of website. The additional “:2083” at the end is the port number that then routes you through to the cPanel installation for your site.
2. Reinforce Your Security
Once you’ve logged into cPanel, make sure nobody else can steal your cPanel ID, whether as a user or an administrator.
Best password practices apply. Change your password at frequent intervals, don’t leave it where it might be seen, and use a combination of characters that cannot be guessed by others.
This means avoiding using any word you can find in a dictionary and any sequence of characters that is connected with you (for example, your date of birth or the name of your dog).
Remember also to do this for each password you have for your different cPanel activities (user, administrator, FTP, and so on). Luckily, cPanel provides a tool to help you – it’s the cPanel on-screen Password Generator.

3. Check Disk Space Usage
It’s great to have websites, and their databases, filled with content that visitors appreciate. It’s not great to bump up against disk space limitations that prevent you or other authorized users from updating or extending that content.
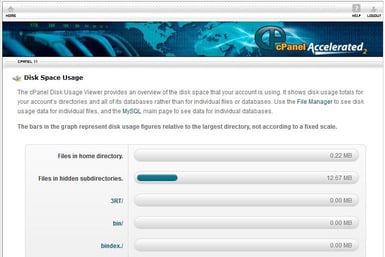
The cPanel disk space usage feature shows you how you are using this resource and which files and directories are taking up the most space.
Remember, disk space can be filled up by emails and website log information, as well as by content. If you see user subdirectories ballooning out of proportion, you may want to set limits on the maximum disk space allocated to each individual.
4. Preferences Panel
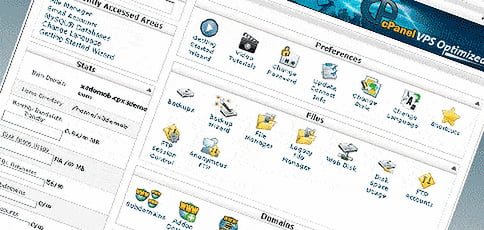
If you haven’t done so already, take a tour of the cPanel “Preferences” window. This has some nifty, useful features to help accelerate your progress to confirmed cPanel user status.
For one thing, the panel has the Change Password feature, which allows you to plug in the strong password you generated in step two. For another, it has the Getting Started Wizard to help you to define basic preferences for how you interact with cPanel.
Other helpful resources include video tutorials covering how to accomplish different activities within cPanel.

5. Domains, Subdomains, and Redirect Settings
Where else would you find settings for domains, subdomains, and redirects than in the cPanel “Domains” box! Among other capabilities, you can create and administer subdomains (like marketing.mysite.com and support.mysite.com).
You can also manage domain redirects so all the visitors going to www.amazingproduct.com (that domain name you were smart enough to reserve) are automatically redirected to www.mysite.com or marketing.mysite.com, for example.
The “Domains” box also lets you manage DNS (domain name server) records, but that’s a little beyond the scope of this article.

6. Mail Account Settings
Perhaps the first bit of information to verify here is the primary email address used by cPanel to contact you and notify you of various events.
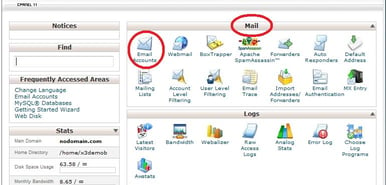
To check or modify this information, click “Update Contact Info” in the “Preferences” box. Then go to the “cPanel Mail” box to manage different aspects of the email accounts associated with a domain name or website.
These controls include adding or deleting accounts, setting forwarding addresses from those accounts, using filtering and auto-responders, and blocking unwanted emails and spam.
7. Set Up Additional Security
Back to the “Preferences” box once again, where you can further define and refine your security policy by choosing the security questions to be used to verify a user’s identity.
Here you can also manage verified access IP addresses – these are the IP addresses from which you can access cPanel without having to answer the security questions.
Check also that certain other functions in cPanel are disabled unless you have a specific reason to use them: no forwarding of unrouted emails (discard them with an ERROR message returned to the sender), and disable the FrontPage extensions that would allow direct entry for publishing content. There’s more – but for another time.

8. Optimize Your Website
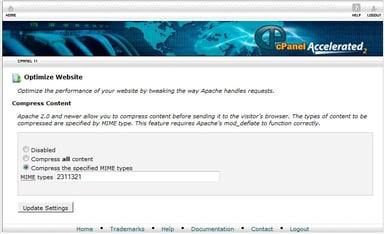
In the “Software/Services” box in cPanel, you’ll find an option for optimizing the content of your website by compressing it when it is requested by site visitors. This can accelerate content download and bring smiles to visitors’ faces.
In this situation, you have the choice to compress all of the content or only specific types.
Note that the “Software/Services” box is also the place to manage the installation of additional software for your website, such as applications to handle visitor inquiries or run user surveys.
9. Manage Databases
At this stage, we’re moving out of beginner territory and into intermediate. You should probably understand the basics of standard SQL databases as a prerequisite.
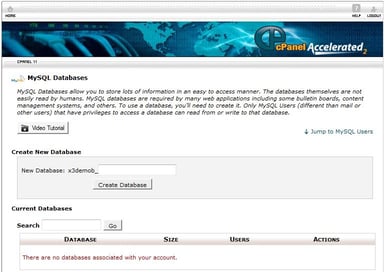
Databases are essential for many applications, where they can hold the content to be displayed (product names and prices, for example) or record information submitted by visitors (names, contact details, etc.).
Two wizards are offered by cPanel to help you set up both MySQL and PostgreSQL databases, two of the most popular SQL database products available today. If any of the applications or packages you install in step eight need either of these databases to be set up, the wizard may be the solution.
10. Look at Your Logs
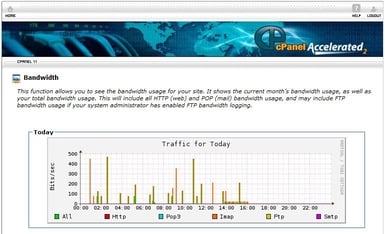
After all your work in the steps above, you might like to know how well your website is doing by going to the “Logs” area in cPanel. Information available includes visitor information, web traffic statistics, and most recent errors found in the website.
You can set the statistics analysis utility you want to use by checking or unchecking it.
Finally…
There is no finally! The information above will help you get started in using cPanel successfully.
After that, cPanel has other levels of functionality and sophistication in store for you, so after you’ve become familiar with the basic settings above, you can look forward to more by diving deeper into the different cPanel administration areas and options.
Photo Sources: risingabovereallife.com
HostingAdvice.com is a free online resource that offers valuable content and comparison services to users. To keep this resource 100% free, we receive compensation from many of the offers listed on the site. Along with key review factors, this compensation may impact how and where products appear across the site (including, for example, the order in which they appear). HostingAdvice.com does not include the entire universe of available offers. Editorial opinions expressed on the site are strictly our own and are not provided, endorsed, or approved by advertisers.
Our site is committed to publishing independent, accurate content guided by strict editorial guidelines. Before articles and reviews are published on our site, they undergo a thorough review process performed by a team of independent editors and subject-matter experts to ensure the content’s accuracy, timeliness, and impartiality. Our editorial team is separate and independent of our site’s advertisers, and the opinions they express on our site are their own. To read more about our team members and their editorial backgrounds, please visit our site’s About page.

