Uh-oh…website backup. Is that complicated? It’s not when you have a well-designed backup wizard in a hosting management control panel.
If you or your provider are using Linux-based cPanel, you’ll find an intuitively simple tool for backups that you can access with a few clicks from the graphical interface. Now you’ll have no excuse not to protect your precious web code, database, and visitor email information.
With a restore process that’s just as easy, you’ll have every reason to be thankful you did execute a backup, if (or is that when?) a server crash or operating error means your backups are all you have left.
Step 1: Start the Backup
The first step is to locate the backup icons in the cPanel web hosting control panel. There are two of them, but the screens they lead to are very similar. We’ve chosen the icon for the Backup Wizard here.
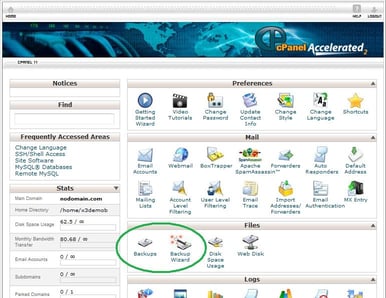
Click on the “Backup Wizard” icon and you’ll see the following screen. Click on “Backup” to start the backup process.
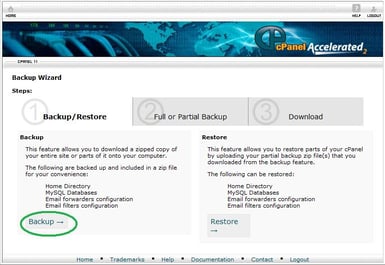
Step 2: Choose Full or Partial Backup
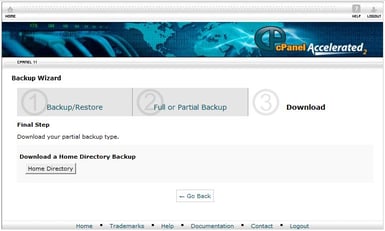
You can then choose to back up all of your site and its components or select certain parts to back up. Note that the home directory backup includes all of the files you own or that you can access (or both).
However, any files you don’t own and that you cannot access are not included in the backup.
You can also work things from the opposite angle. By putting a configuration file in your home directory, you can exclude specific files and directories from your backup.
Choose full backup by clicking on (you guessed it) “Full Backup.”
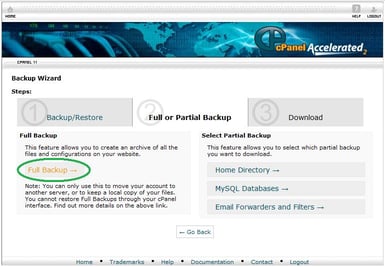
Alternatively, instead of choosing to execute a full backup of your site, you can opt to back up just part of your site, such as your home directory. Then, cPanel will let you save your partial backup to your local disk.
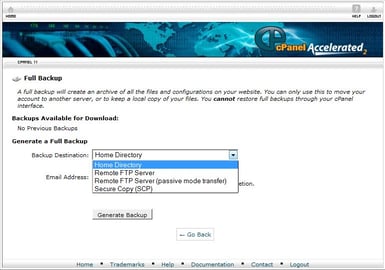
However, for what follows, we assume you’ve chosen the option for a full backup.
Step 3: Choose Where to Store the Backup
You can either store the backup in the home directory for your website or (perhaps to lower risk) download the backup to another machine.
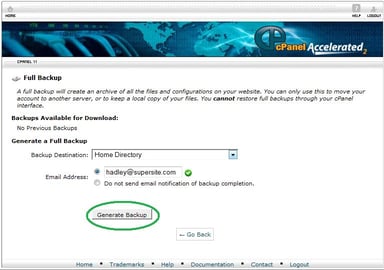
If you choose the option for the home directory, then fill in the field with your email address to get notification of successful completion of the backup.
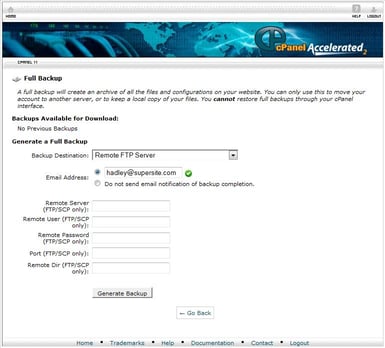
If you choose the options for FTP or SCP transfer of the backup data to another location, you’ll be prompted for your connection details (and you can still enter your email address for notification.)
The Backup Wizard will then perform the backup in accordance with this information.
4. Restoring Your Backup
What if you want to restore data you’ve downloaded and have your website run with a specific backup? It’s simple – choose the “Restore” option instead of the “Backup” option in Step 1 above to see this screen:
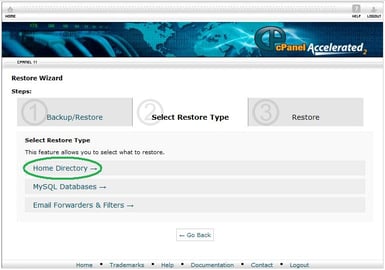
Select what you want to restore (for example, the home directory in this case) and browse for the location on your computer where you’ve stored the backup.
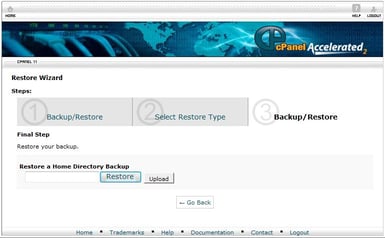
Note that a complete restore, as cPanel states, must be done part by part: home directory, then database, then email information, for instance.
In that case, just run the Wizard several times, selecting one part after the other each time, until your website is running with all of the backup versions of your choice.
HostingAdvice.com is a free online resource that offers valuable content and comparison services to users. To keep this resource 100% free, we receive compensation from many of the offers listed on the site. Along with key review factors, this compensation may impact how and where products appear across the site (including, for example, the order in which they appear). HostingAdvice.com does not include the entire universe of available offers. Editorial opinions expressed on the site are strictly our own and are not provided, endorsed, or approved by advertisers.
Our site is committed to publishing independent, accurate content guided by strict editorial guidelines. Before articles and reviews are published on our site, they undergo a thorough review process performed by a team of independent editors and subject-matter experts to ensure the content’s accuracy, timeliness, and impartiality. Our editorial team is separate and independent of our site’s advertisers, and the opinions they express on our site are their own. To read more about our team members and their editorial backgrounds, please visit our site’s About page.

