

Writer: Joe Warnimont


Editor: Britain Simons


Reviewer: Cristian Lopez

I can’t say I’m proud of my first n8n installation. Before discovering Kamatera as an option for deploying n8n (my favorite tool for making workflows between apps that don’t automatically talk to each other), I deployed n8n in a manual Docker install. That took about four hours to complete. The perk? There are no artificial limits when you’re paying for the infrastructure.
Little did I know, Kamatera has a prebuilt n8n image in its marketplace, so it should actually take me no more than five minutes to install. A prebuilt image is awesome news for you. It’s like walking into a hardware store and buying a preassembled grill instead of a box full of metal pieces, screws, and nuts. Even if you’re handy, it saves you time and energy.
I’ll show you how to deploy n8n on Kamatera by using that prebuilt app image. On top of that, I’ll explain how to pick the right server resources, make the server secure, and access it with ease. Ready to build your stable n8n 24/7 workflow environment?
-
Navigate This Article:
Step 1: Create a New Server on Kamatera
The process begins by going to the Kamatera website. Kamatera is a performance cloud hosting solution I use for its affordability and ease of installing more complex server types. So, if the process might take me hours dealing with a Docker install or adding all the elements needed for something like an Ubuntu, Linux, or MariaDB install, it makes sense to use Kamatera instead.
I also want to note that you’ll be running commands in a Terminal for this process. You’ll feel more comfortable if you have some Terminal experience, but I’ve made the process easy enough for virtually anyone to understand how to do it.
Keep in mind that you don’t have to download or install n8n separately. It’s included as an app when you add a server in Kamatera.
Kamatera — Deploy n8n

Monthly Starting Price $6.00
- Deploy n8n workflows across 20+ global data centers
- Scale vCPU and RAM instantly on demand
- Full root access, completely configurable
- Only pay for the resources you actually use
- Get started with n8n on Kamatera»
OVERALL
RATING
Because it already has dozens, if not hundreds of prebuilt app, server, and operating system images. And n8n is one of them.
Once you’ve signed up for Kamatera and logged into your account, go to My Cloud > Create New Server.
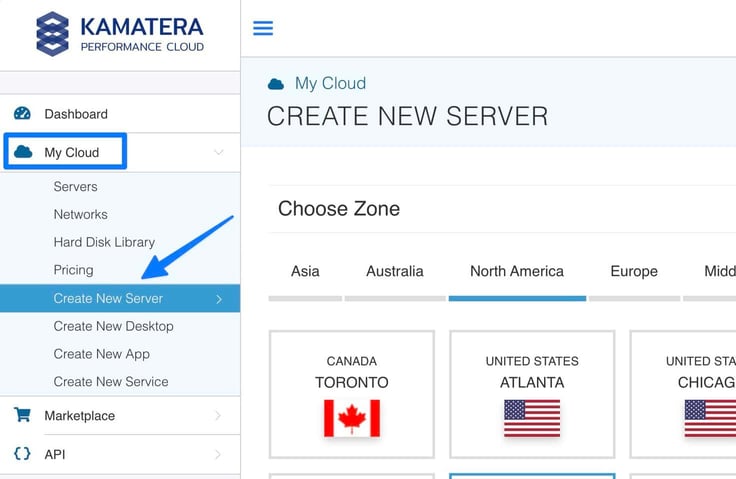
The first step in creating a server is to select a zone. This is where your server will be located. I ensure my servers always sit as close to me as possible. This helps with performance. I’ll go with Chicago, but you might opt for something else.
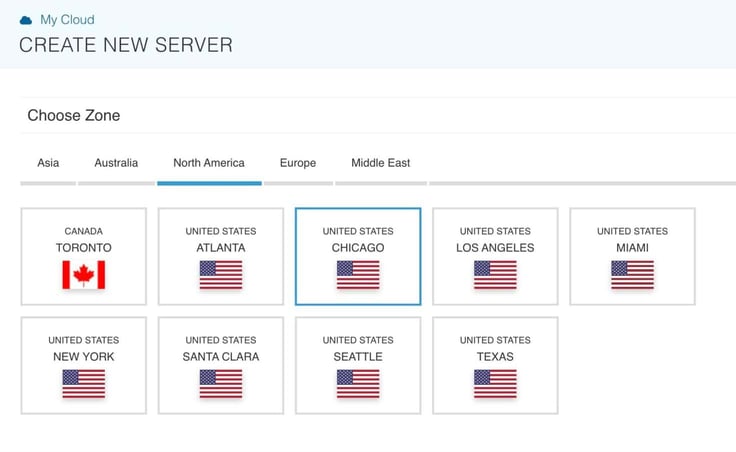
The most important part is to at least select a server in your country. The closer your server, the faster your app’s response times, because the server’s physical location matters.
Step 2: Pick the Prebuilt App Image for n8n
Alongside app images for cPanel and phpMyAdmin, Kamatera lists n8n as one of its pre-made app images.
I would’ve killed for this type of option in the past. It means you still get to self-host and control everything after the setup. The main difference is that you mustn’t spend hours on technical processes like trying to install Docker and put n8n inside that instance.
Overall, n8n is a workflow-building tool. So why muddy the process with a complicated installation? The prebuilt app image from Kamatera sends you right to the fun part: designing workflows.
While in the Create New Server section in Kamatera, click on the Apps Images tab.
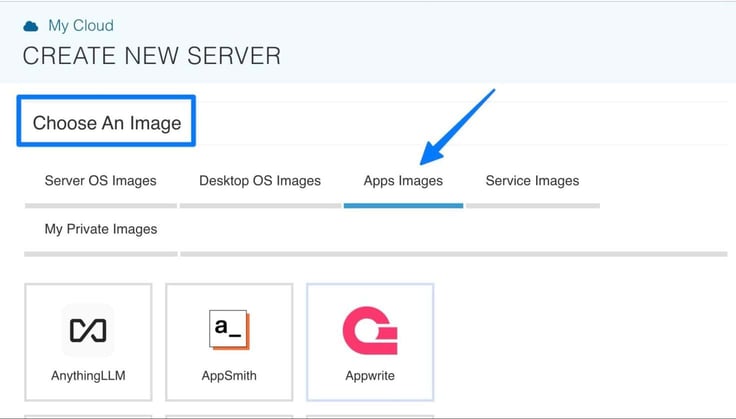
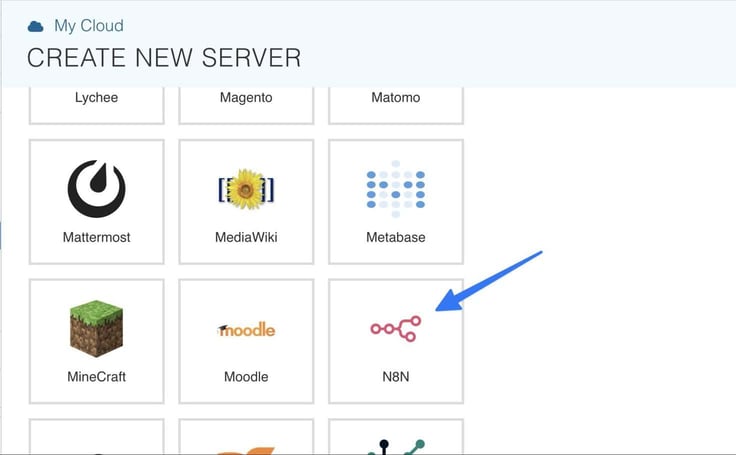
The first time I looked at this section it blew me away with how many app images came with Kamatera, even MineCraft. Take note of other projects you can work on in the future, but for now, scroll down to n8n. Select it to proceed.
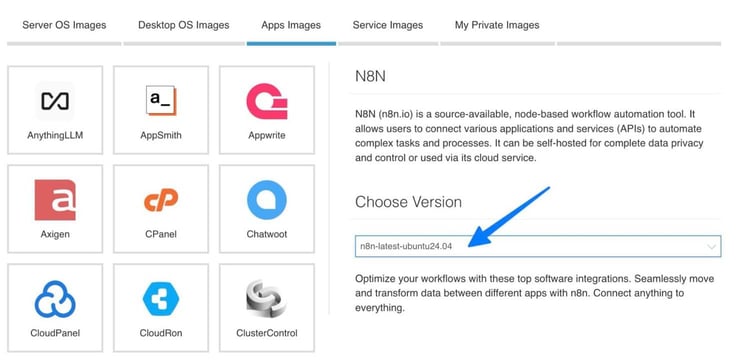
Before doing anything else, you have to scroll back up on the page to pick a version of n8n. I had trouble with this before, because I didn’t realize you had to go almost all the way back to the top of the page to make this happen.
Under Choose Version, select the most recent version in the dropdown menu.
Step 3: Choose Server Specs for Your n8n Server in Kamatera
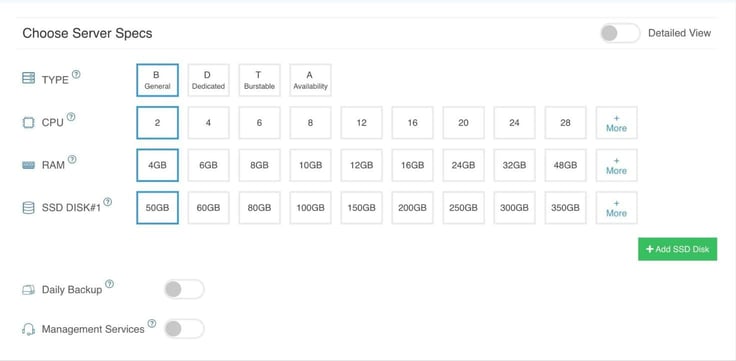
With the n8n app image, and its correct version selected, you’ll move on to picking the right server specs for your n8n server. Luckily, it’s all pretty simple, since n8n doesn’t hog resources.
Here are my suggestions starting out:
| Setting | Recommendation | Reason |
| Type | General | This balances your RAM and CPU. There’s no need to any dedicated tiers at this point. |
| CPU | Two cores | Most n8n instances use a small amount of CPU. |
| RAM | Four gigabytes | My n8n installs usually require more RAM than CPU, but I still start small. You may have to go somewhere between four and eight gigabytes. |
| SSD | 50 gigabytes | Don’t overpay for space you won’t use. This is plenty of space for n8n, its logs and databases, when getting started. |
Pick your server specs, and consider going up on the RAM if you think it is necessary. When my automations choke, that’s the reason to scale resources up. Until then, save your money.
Keep in mind, you can also choose to activate a daily backup or management service. I usually opt for a daily backup, but the management services are only needed if you want to pay for a hands-off management experience.
You’ll notice a section called Choose Networking that asks if you want the following:
- Public Internet Network
- Private Local Network
Make sure you activate the Public Internet Network, since n8n is an automation tool and will need a public IP for pointing to webhooks and your domain. Leave the private local network off.
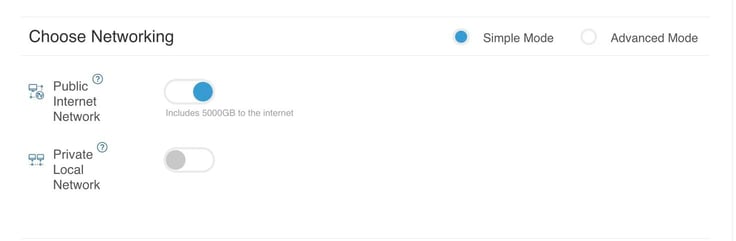
There’s no need for you to explore the Advanced Mode in the Choose Networking section. What we talked about is all you need.
Step 4: Configure and Power On Your Server
The server doesn’t turn on all by itself. At the end of the page, find the Finalize Settings section:
- Make a strong password and validate it.
- Mark that you’re turning on one server
- Name your server for reference on your dashboard.
- Also, be sure to turn on the switch to Power On Servers.
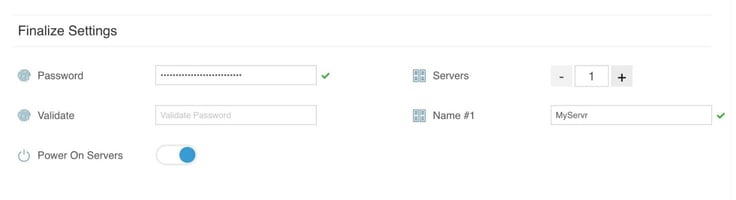
After all that, scroll down to ensure the pricing looks acceptable for your organization, then click the Create Server button.
Step 5: Access Your Server via SSH
To access your n8n server, you can either connect your own domain name or use the generic domain provided by Kamatera. But before any of that, you need to connect to your server via SSH.
To do that, go to My Cloud > Servers. Open your server and select the Overview tab. Here, find the Public Internet IP (WAN) section. Copy that IP address.
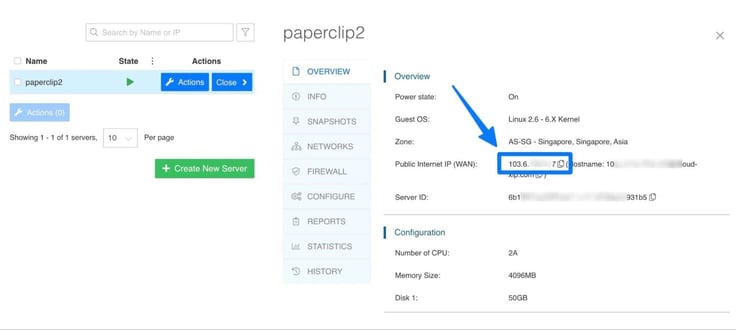
Next up, open the Terminal on your Mac or Windows.
Use the following command to access your server via SSH:
ssh root@YOUR.IP.ADDRESS.HERE
Replace the “YOUR.IP.ADDRESS.HERE” part with the IP we just copied from your Kamatera dashboard. Don’t worry about changing the 5678 number. That’s the documented default port for n8n.
It should now tell you that you’re logged in at the terminal.
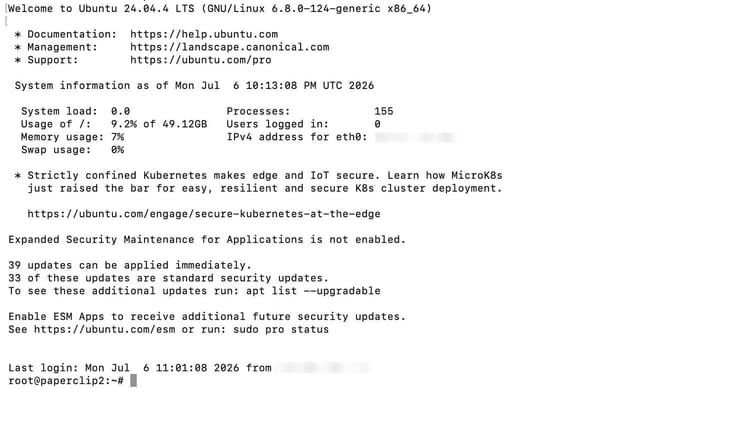
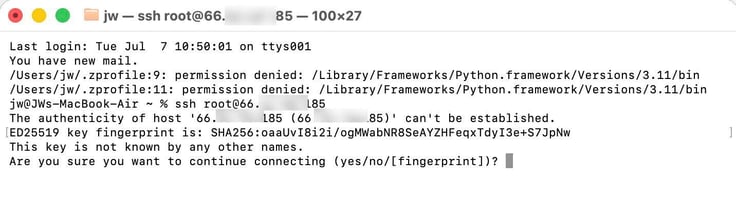
Follow the prompts in the terminal. For instance, you may have to type in “yes” to continue.
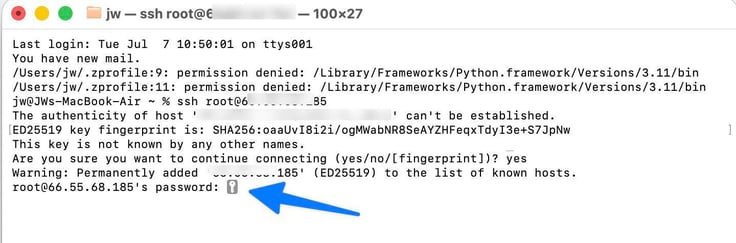
If you recall, you created a password while setting up n8n on Kamatera. Type in this password, then click Enter.
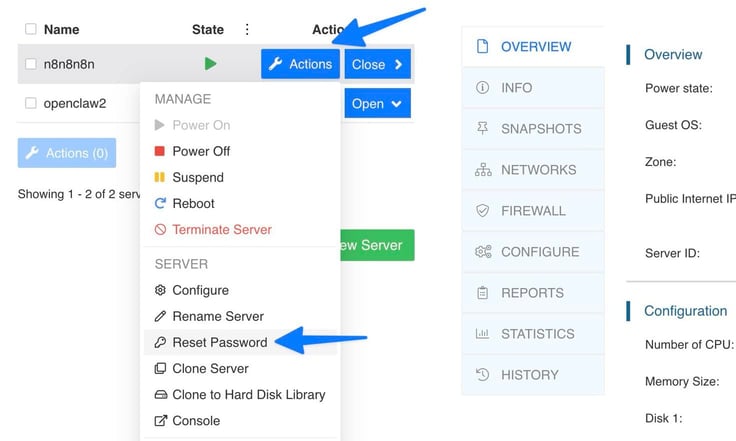
Note: If you have trouble with your password, go to Actions > Reset Password in Kamatera to create a new one.
Once you’ve entered the right password, you’ll see a welcome message from Ubuntu, the operating system used for n8n on your server.
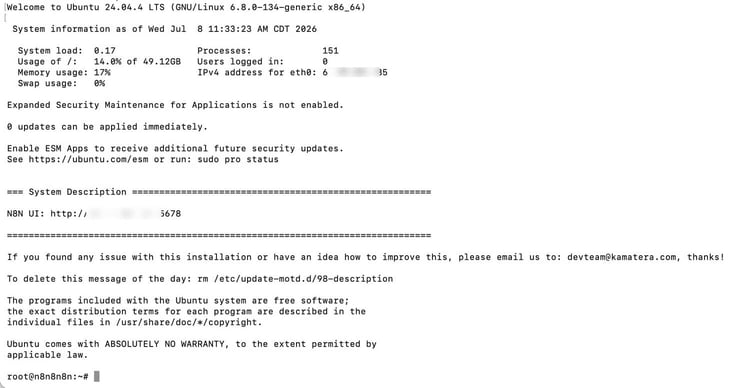
You now have a server with an n8n container alive and running. Next up, you need to secure your server with a firewall.
Step 6: Secure Your n8n Server
Open your server in Kamatera and go to the Firewall tab. Here, you should see a box telling you that the firewall is disabled. Check off that box to enable the firewall.
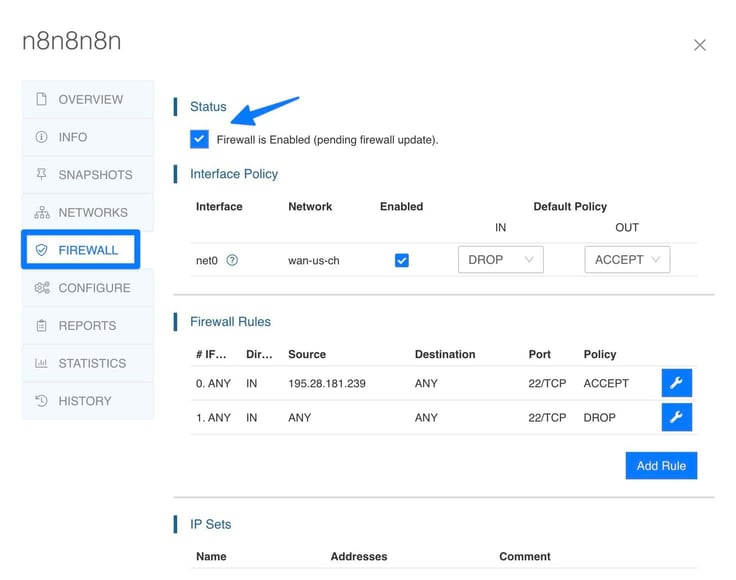
The first time I did this, I noticed that Kamatera actually added an interface policy automatically, along with two firewall rules.
You can leave these rules:
- The first rule says that your device’s IP is okay.
- The second rule blocks everyone else. It’s sort of like a bouncer at a bar looking at you and saying, “You’re good to come and go as you please,” the first time you walk in.
Note: These two initial rules block every device from your server’s SSH access besides your current computer. Keep this in mind in the future. Home and office networks occasionally change your device’s IP, and you may end up wanting to access the server from another device.
In those instances, you’ll have to modify these rules to include the new IP addresses.
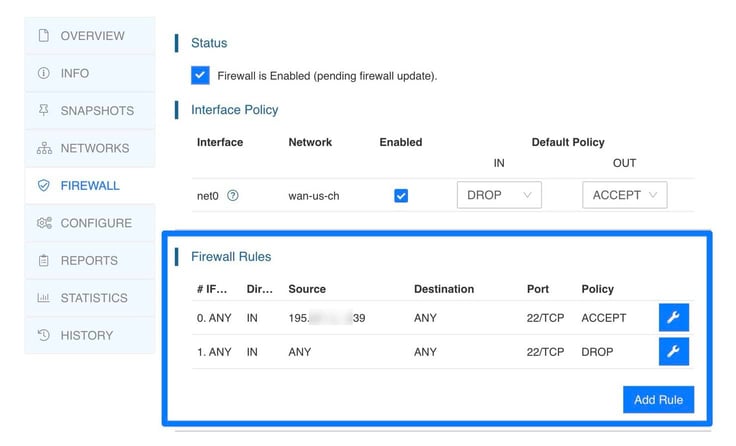
It’s also important for you to know that you need a few more rules to make your server truly secure. You need to add rules for three other ports, so other features and tools can access the server without hitting the firewall.
Here are the ports to add to your firewall rules:
| Port | Purpose | Why n8n needs this port |
|---|---|---|
| 80 | General web traffic (HTTP) | Mainly used by Let’s Encrypt to verify domain ownership before you get an SSL certificate. |
| 443 | Secure traffic (HTTPS) | This is the true front door everyone will use to visit your server, since it’s the secure route. |
| 5678 | The default interface for n8n | You need this to gain access to the n8n interface. |
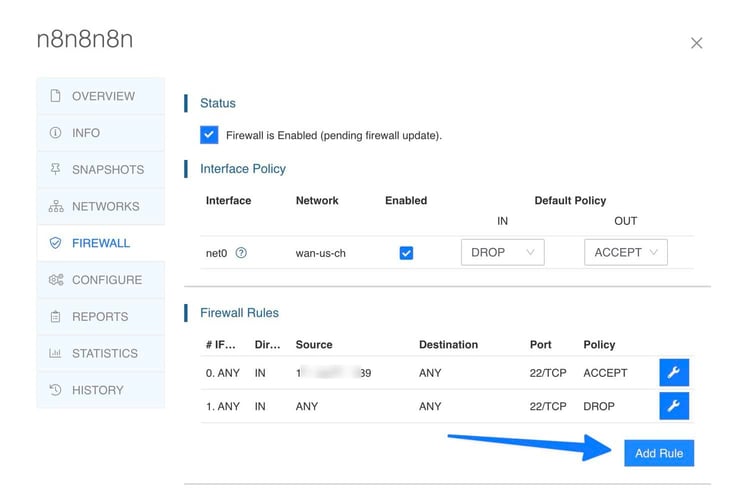
To add rules for all these ports, click on Add Rule under Firewall Rules.
Configure all three rules like this:
- Direction: IN
- Interface: ANY
- Macro: Not Selected
- Protocol: tcp
- Source: IP/CIDR; leave as ANY; leave the Port BLANK
- Destination: Pick your IP Address from dropdown; Port: 80 (you’ll need two more rules with 443 and 5678
- Policy: Accept
- Comment: Blank
- Position: 0
- Enable: Checked
Click Add Rule when you’re done.
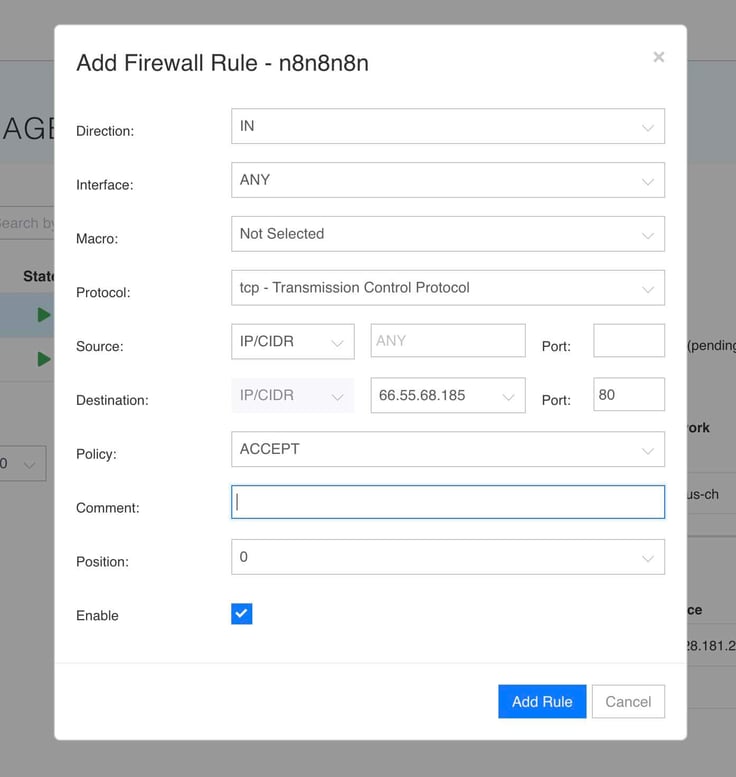
The only difference each time will be the Destination Port, where you’ll type in “443” and “5678” for the two other rules. In total, you’ll add three more rules.
This last step is very important. I often forget to do it. Luckily, Kamatera gives you a reminder if you forget, but just so you know, you need to click the Update Firewall button (at the far bottom of the page) for these changes to take effect.
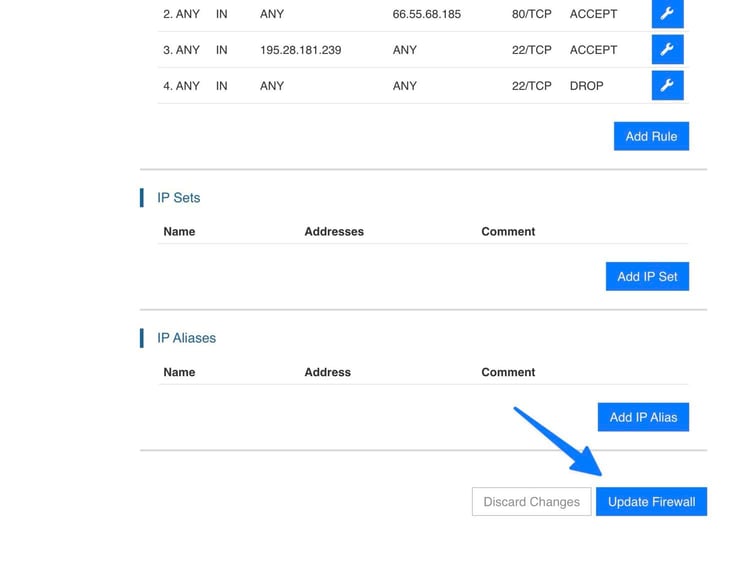
Your n8n server is now secure.
Step 7: Open the n8n Interface
Remember all that work in the Terminal? You can forget about that for now, because it’s time to open the n8n interface in your browser. This is the fun part.
Simply open the following URL in the browser of your choice, swapping out the YOUR.IP.ADDRESS.HERE part with your server’s IP address. Which can be found by opening your server in Kamatera and going to Overview > Public Internet IP (WAN).
Note: The number 5678 is the default port for accessing n8n. This will never change.
http://YOUR.IP.ADDRESS.HERE:5678
You should now see the n8n account setup page. Create an account by typing in your:
- First Name
- Last Name
- Password (a new one)
Click the Next button.
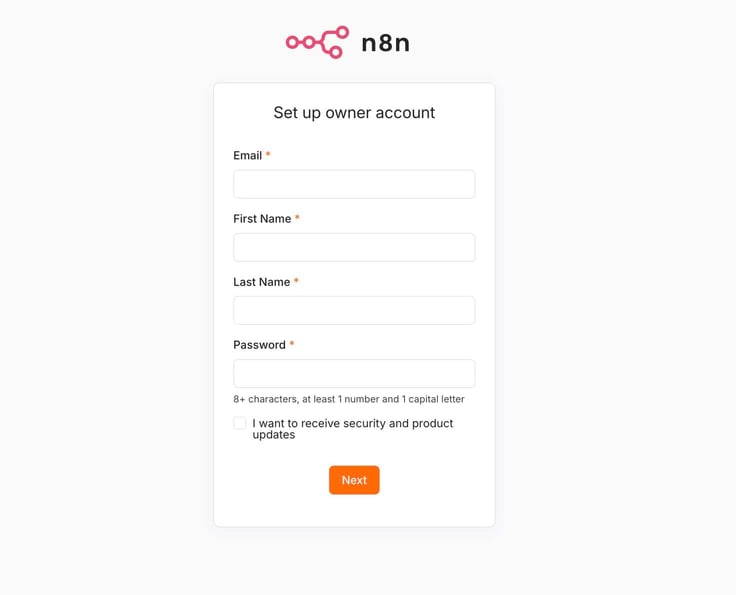
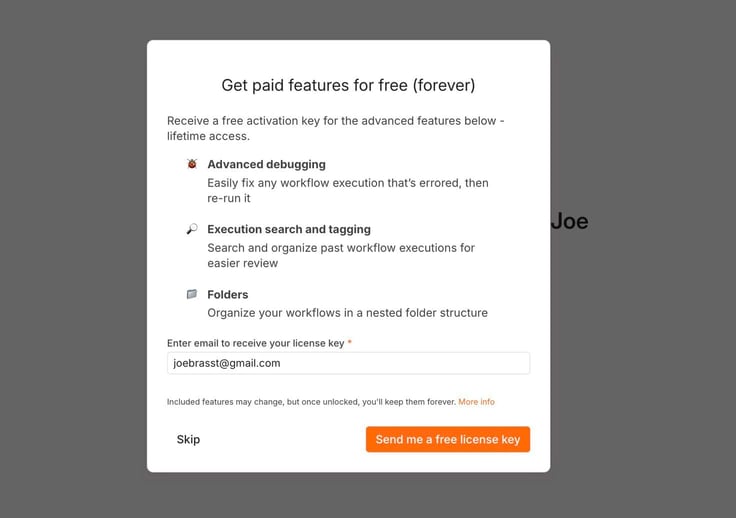
Walk through the initial prompts. I recommend everyone opt for the free license key that gives you extra features.
After that, it brings you to the n8n dashboard!
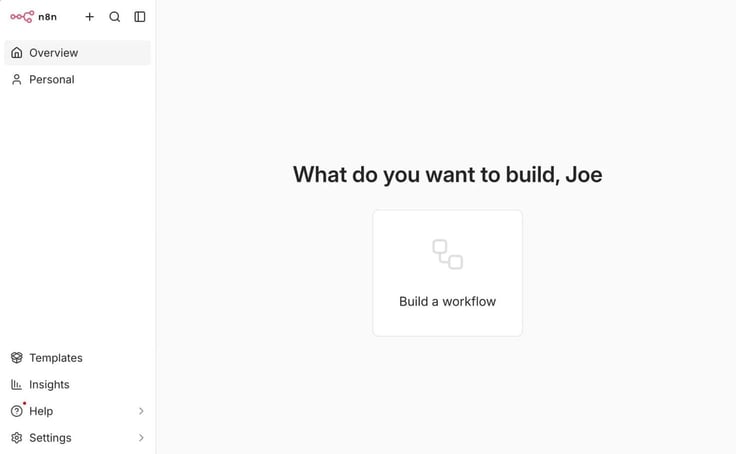
I find the n8n interface pretty straightforward. They literally only give you one button to start with (Build a Workflow), which then leads you to the workflow designer. I also like that you have templates available for making these workflows.
You can also explore areas for:
- modifying settings
- Checking insights
- Finding customer support
Step 8: Configure Your Domain and Reverse Proxy (Nginx)
At the moment, n8n lives behind a simple IP address and the n8n port number. That’s fine for testing, but it’s not something you’d want to share with a client or boss. The goal is to add a domain, or use the working hostname provided by Kamatera.
I love that Kamatera gives you a free, functional hostname. It works just like a regular domain name.
You can find that hostname by opening your server in Kamatera, then going to Overview > Public Internet IP (WAN).
It looks something like this:
YOUR.IP.ADDRESS.us-ch-cloud-xip.com
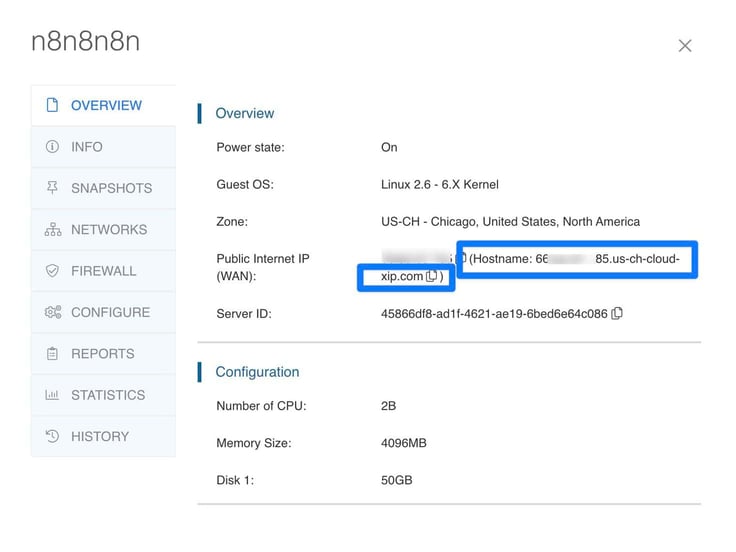
To make the hostname your server’s front door (instead of the IP address and port number) we need to:
- Install an instance of Nginx on the server
- Make a config file for pushing that hostname to n8n
- Point the new config file at the 5678 port
Here’s a quick rundown on how to do all that (back in the Terminal — sorry):
SSH into the server with your IP address:
ssh root@YOUR.IP.ADDRESS.HERE
Run this command to update your package list:
(This is standard practice to refresh the list of software being used)
apt update
Now you install Nginx with this command:
apt install nginx -y
With Nginx installed and running, you can create a config file that informs Nginx what to do with all incoming traffic.
Start with this command:
nano /etc/nginx/sites-available/n8n
This reveals a completely blank file in your Terminal.
Paste this content into that file:
server {
listen 80;
server_name 66-55-68-185.us-ch-cloud-xip.com;
location / {
proxy_pass http://127.0.0.1:5678;
proxy_http_version 1.1;
proxy_set_header Upgrade $http_upgrade;
proxy_set_header Connection “upgrade”;
proxy_set_header Host $host;
proxy_set_header X-Real-IP $remote_addr;
proxy_set_header X-Forwarded-For $proxy_add_x_forwarded_for;
proxy_set_header X-Forwarded-Proto $scheme;
proxy_read_timeout 86400;
}
}
Press Ctrl + O on your keyboard. Click Enter, then Ctrl + X to exit.
Next, enter this command to tell Nginx about the new file:
ln -s /etc/nginx/sites-available/n8n /etc/nginx/sites-enabled/
Run this command to restart Nginx and activate the new config:
systemctl restart nginx
You should now be able to visit that hostname provided by Kamatera (http://YOUR.IP.GOES.HERE.us-ch-cloud-xip.com) to access your n8n dashboard. Replace your IP.
A Few More Things Worth Setting Up in n8n
Although I won’t walk through all of them in detail, I have a few more suggestions worth configuring for a solid n8n setup.
Further n8n configuration:
- Enable HTTPS: Consider using Certbot for an SSL certificate. It handles the setup and auto-renewal for you. A simple task to avoid unsecured browser warnings.
- Update some important environment variables: The most important ones include N8N_HOST (for your instance), N8N_PROTOCOL, WEBHOOK_URL (your full public URL), and N8N_PROXY_HOPS. These ensure your webhooks end up working.
- Watch server resources: The n8n app isn’t a resource hog, but you may have to upgrade in Kamatera at some point. Keep an eye on your CPU and RAM usage.
- Configure regular server snapshots: This is a backup of your workflows in the Kamatera dashboard. It’s a worthwhile insurance policy.
You’re Ready to Build Workflows in n8n
Here’s what I love most about deploying n8n on Kamatera: it’s fully yours. Not only do you receive a quick setup process without headaches I’ve experienced in the past, but there’s no vendor lock-in for your automations. And you have complete control over your data and workflows.
Here’s where the real fun starts. I encourage you to look at whatever problems you have in your organization and solve those problems with n8n workflows. Once you set up one workflow, you’ll be making dozens each week.
Want more guides? We’ve also covered how to deploy OpenClaw on Kamatera!
If you need further guidance, you can easily explore our library of guides with our smart tool HostHelper™. You can instantly access accurate, expert-backed answers drawn from thousands of in-depth how-to articles and reviews.
Be sure to give our social media a follow, too! It’s full of useful tips and short videos for entrepreneurs, web devs, and all your tech tips. Enjoy!